power_settings_newFirst Principles
Duperset is a SaaS Analytics service based on open source Superset.
Duperset allows you to get started in minutes with Superset and take advantage of a rich set of features focused on data exploration and visualization, with charts and dashboards.
There are a few key concepts you need to familiarize yourself with in order to get started with Superset.
Once you've done that, everything is pretty self-explanatory in Superset’s UI.
Databases and Datasources and Tables and Fields and Slices, Oh My!
Superset provides a tight level of control (and simplification) to accessing your data whereby, unless you explicitly make them available as Datasources, tables and their fields in your database are not available for visualization.
Datasources can be created either by defining available Tables and associated Fields; or by creating SQL Queries and defining datasources out of them.
In either case, you’ll need to first configure your
Databases - i.e. the database(s) you want to explore.
You'll then define a combination of:
.
Tables -the tables you want to enable access to- and associated
Fields -the tables’ fields you want to allow access to.
and/or
.
SQL Queries - SQL Select statements that you can save and make available as Datasources.
Then your users will be able to create and edit
.
Slices - visualizations on your Tables and related Fields
.
Dashboards - sets of Slices that can be shared
We'll walk you through all these below.
Everything Is A Record
In the Superset UI (and underneath its hood) everything is internally maintained as a record - i.e. the configurations of Databases, Tables, Slices, etc... are maintained as records.
This is extremely powerful, but can also be confusing at first:
. It’s powerful because it’s a unified model that allows fine granularity of access control
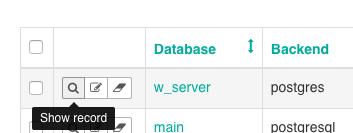
. It can be confusing because you’ll see language in the UI that says “show record” that in fact means “show the details of this database configuration”. As an admin, you’ll also see configuration data -such as the core metrics you’ll define- available as records to view, edit, or delete.
(Note that these are actual records that are stored in a separate configuration database which we automatically provision and maintain for your own instance of Superset on Duperset)
import_exportConnecting To Your Target Database(s)
Your first step is to connect to the databases you want to explore.
(We recommend connecting to slave/replicated DBs rather than your primary production DB.)
Navigate to (Menu -> Sources -> Databases)

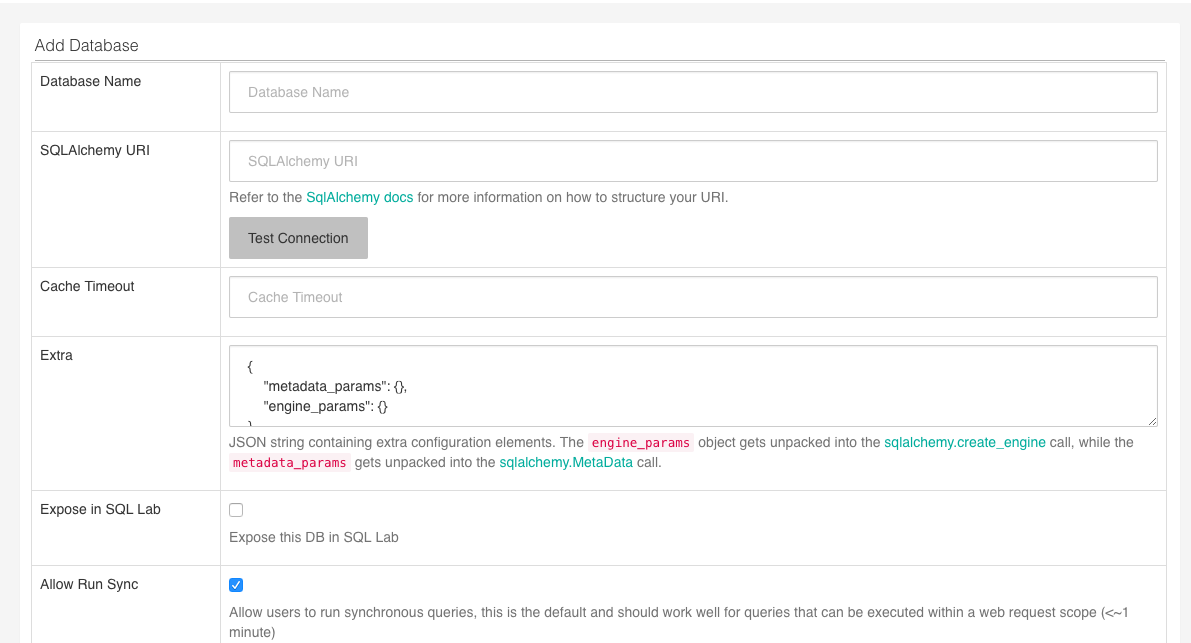
and click the + sign on the far right to configure a new Database source

The available fields are self-explanatory - one critical thing to note:
SQLAlchemy URI: if you’re on Heroku, this is going to be the database URL specified in your Settings / Config Vars.
It should be in the format:
postgresql://{userid}:{password}@{host}:5432/{dbname} - where 5432 is the port for Postgres if you’ve sticked to the defaults.
Make sure that the URL starts with postgresql and not just postgres - postgres:// will kinda-work, but you’ll run into issues down the road.
view_moduleCreating Datasources Using Tables
Once you’ve configured the database(s) you want to connect to, you can create Datasources for your visualizations either by configuring Tables, or by defining queries using SQL Lab.
When using Tables, you need to explicitly define which tables in your database you want to give access to, and for each table, which fields you want to give access to.
The initial steps for adding a new Table are similar to adding a new Database: Navigate to (Menu -> Sources -> Tables)

and click the + sign on the far right to configure a new Table source.

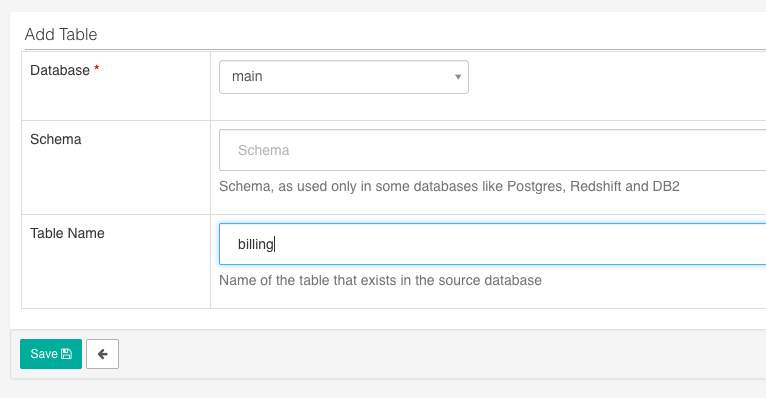
The one thing that differs is that you need to then go back and “Edit the Record” you just created to actually configure which fields will be available.
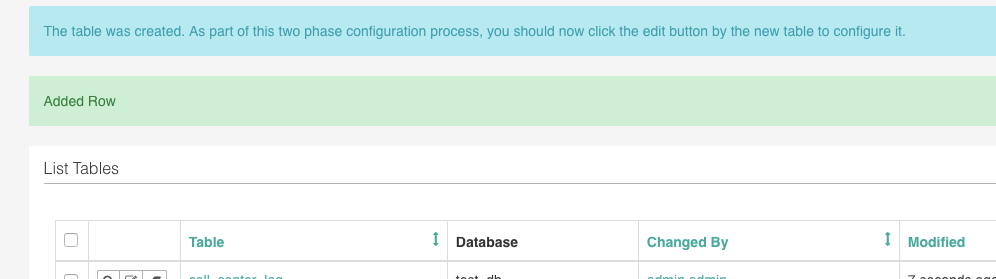
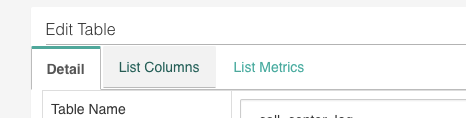
Once on the Edit Table screen, navigate to the List Columns tab.
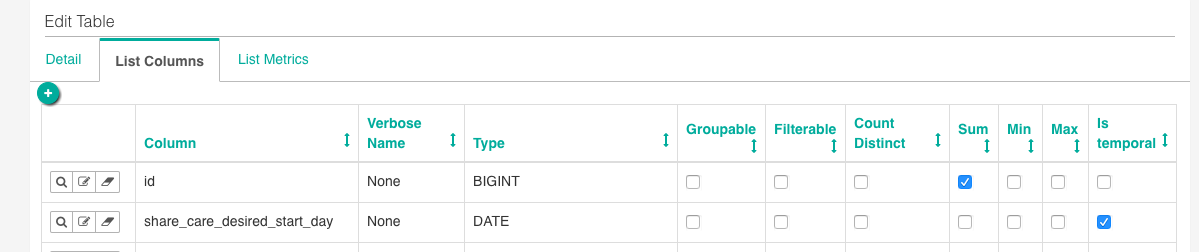
This is the place where you’re not only defining which fields are available to your users, but also the underlying semantic - as to whether they can be grouped, counted, summed, or considered as dates/times.
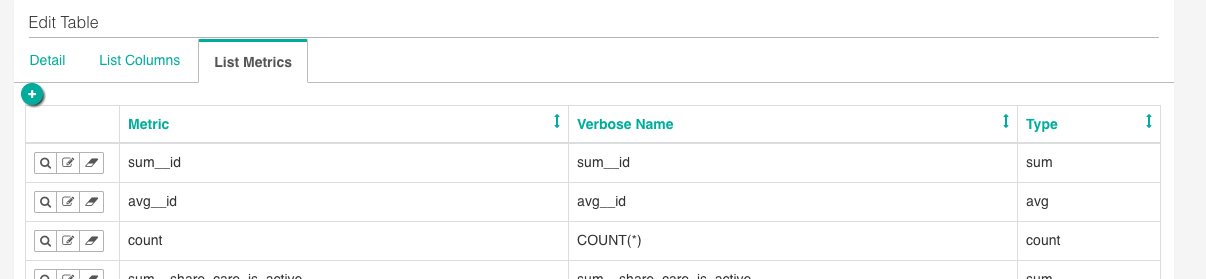
In turn, these become available as metrics available to your users.
At this point, you and your users have the basic blocks in place to start creating visualizations (“Slices”) and Dashboards.
view_columnsCreating Datasources Using SQL Lab
The alternative to defining Tables as Datasources is building SQL Queries using SQL Lab.
Navigate to (Menu -> SQL Lab).
The SQL editor allows you to write and run SQL queries on your configured databases.

Click on the Visualize button when you want to make a query available as a Datasource.
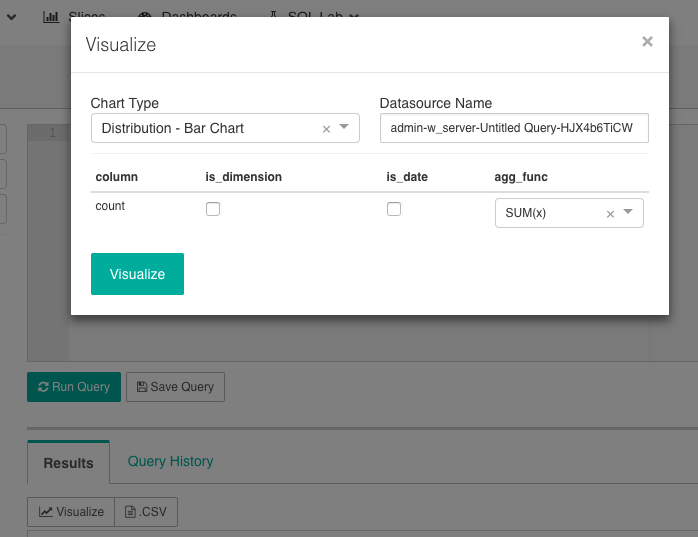
You can then select the type of visualization you want to build (you'll be able to change that later); but also change the name of the Datasource, to make it more explicit, and define the dimensions you're making available.
dashboardCreating Slices And Dashboards
When you want to create a new visualization (“Slice”) from scratch, you do so in much of the same way as everything else - by navigating to the Slices page and adding a “new record”.

You then chose a datasource and a visualization type
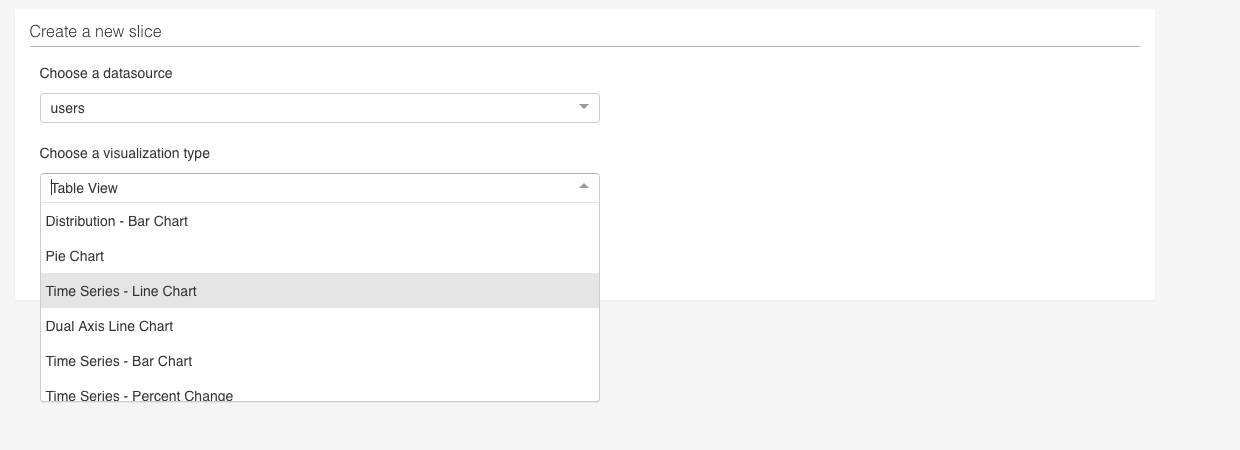
and roll into the Exploration screen.

A couple of things to note:
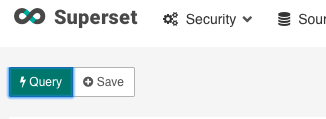
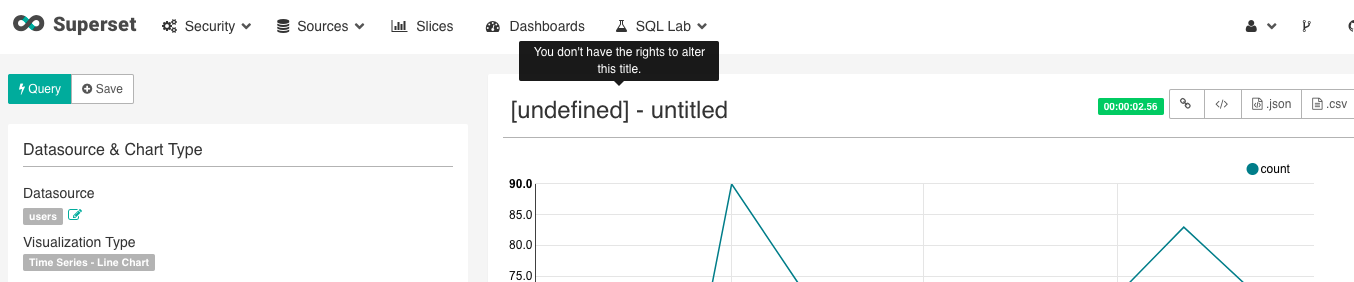
. As you modify your Slice, you’ll need to click [Query] in order to see your changes reflected - unless the configuration you’re modifying is labeled with a [flash] sign, in which case, the change takes effect immediately
. The Slice’s title is going to be “[undefined] - untitled” and when you hover over it it will tell you “you don’t have the rights to alter this title” - but yes you do: just save your new Slice and give it a name
. The documentation is sparse and the depth of functionality very extensive - we recommend you play around with the different types of visualizations, Advanced Analytics and SQL features, and Filters
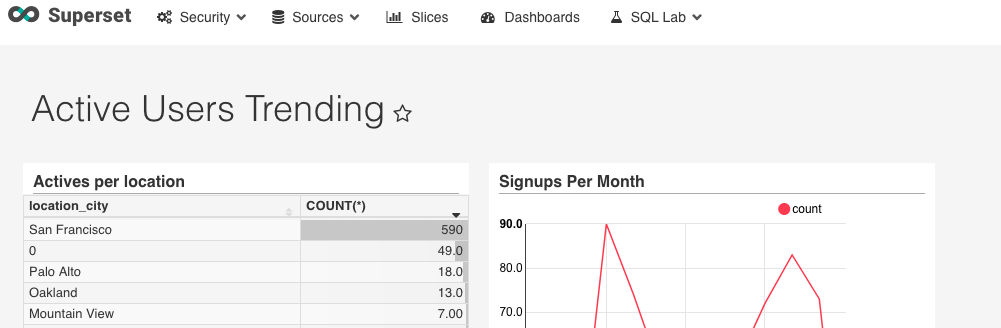
Dashboards are created along similar steps as Slices.
For additional documentation on how to explore your data, create Slices and Dashboards, you can look at to the official documentation of the Superset project at
https://superset.incubator.apache.org/tutorial.html